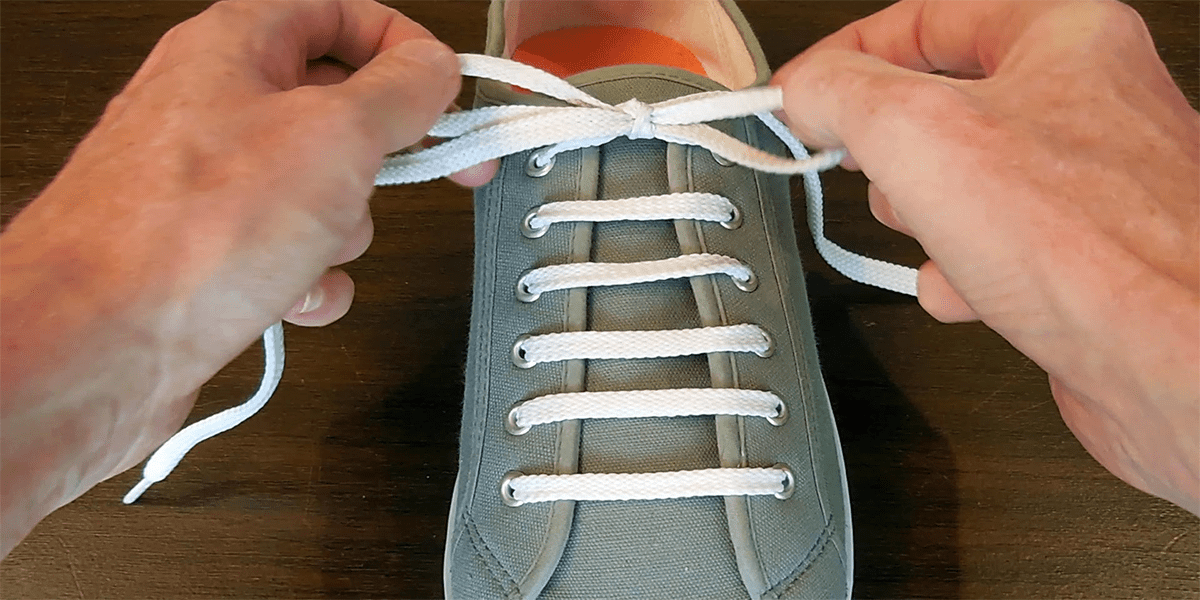
The way you lace a shoe changes how it looks and how it fits. Here are five ways to lace sneakers, each with the steps. Every one starts the same way: take the lace out, begin at the bottom pair of eyelets, and keep both ends the same length as you go.
Some styles need a longer lace than the one your shoes came with. Here's how to work out the length.
1. Criss-cross: the everyday standard
Most shoes come laced this way. It's secure, and it's easy to tighten.
- Run the lace straight across the bottom pair and bring both ends up through those eyelets.
- Cross the ends over the tongue and feed each one up through the next eyelet on the opposite side.
- Repeat until you reach the top, then tie.
2. Straight bar: clean lines across the top
Every bar on top runs straight across, and the lace climbs out of sight underneath. It's a popular look on basketball and lifestyle sneakers, and it uses about as much lace as criss-cross. It works best on shoes with an even number of eyelet pairs.
- Run the lace straight across the bottom pair on the outside and push both ends in.
- Take the left end up one eyelet on the inside, bring it out, cross straight over and push it in on the right.
- Take the right end up the inside, skipping the eyelet the left end just used. Bring it out, cross straight over and push it in on the left.
- Keep going: each end climbs the inside, skipping one eyelet, then comes out and crosses straight over. When an end comes out of the top pair, leave it there. Bring the last end out of the other top eyelet. If you're lacing an even number of pairs, it climbs just one eyelet. With an odd number, that eyelet is on the far side, so run the end across underneath to reach it.
3. Heel lock: stop your heel slipping
Also called a runner's loop or lace lock. It holds your heel down, which helps stop rubbing and blisters on runs and long walks. It needs the extra eyelet many running shoes have near the ankle.
- Lace as usual up to the second-to-last eyelet, leaving the top eyelet on each side free.
- On each side, take the end straight up the outside and push it in through the top eyelet on the same side. Leave a small loop.
- Cross each end over the tongue and thread it through the loop on the other side.
- Pull the ends down to close the loops snug, then tie as normal.
4. No-tie: a slip-on look
The laces stay done up and you slip the shoe on and off. It only works if the shoe goes on easily without loosening the laces, so test the fit before you trim or tuck anything.
- Lace straight bar (above), but when the first end comes out of the top pair, cross it straight over and push it in. Leave the last end inside. Both ends are now inside the shoe.
- Tie the two ends together in a small, flat knot.
- Tuck the knot and the ends under the tongue.
5. Checkerboard: two colours woven together
This one takes two flat laces in two colours. The first does the fastening, and the second is woven through it.
- Lace the first colour straight bar (above) and tie it, or tuck the ends inside.
- Starting at the bottom, weave the second lace up the bars: over one, under the next.
- At the top, turn and weave back down, going under where you went over before. That's what makes the checks.
- Repeat until the bars are covered, then tuck the ends of the second lace under a bar.
The woven lace can need more length than the first. Wide flat laces show the pattern best.
Bonus: a bow that stays tied
If your bow sits crooked, pointing from toe to ankle instead of across the shoe, you're tying what's called a granny knot. It comes undone more easily. Tie your first knot the other way round: if you cross left over right now, cross right over left, or the reverse. Keep the rest the same. The bow then sits straight across and holds.
Ready to try one? Flat, rope and oval laces come in a range of colours and lengths.